


This is the last installation we did before Christmas. I made side panels and sheers for this family room. The panels are stationary and are made from a Westgate fabric with a beaded tassel fringe trim on the attached valance. The hardware is a 3" double traverse rod in bronze from Select Drapery Hardware . The sheers are on a bronze colored traversing rod behind the wood rod. The smaller window was covered with a roman shade with the same fabric and fringe at the bottom.
 In the cigar room we installed wood blinds in a mahogany finish for privacy and fixed shades over top. The shades are made of fabric from Morocco with a ball fringe on the bottom and leather covered rods on the top. I think this is one of my favorite treatments ever !
 Lastly, I added these gorgeous tiebacks to the draperies in the pool room.
  I'll be posting this at BNOTP for Metamorphosis Monday so be sure to stop by........
Sunday, December 27, 2009
Installation of the Week

Sunday, December 20, 2009
Merry Christmas
 Well, Christmas is almost here ! The house is decorated, presents are bought and the menu is planned. I still have a few more presents to wrap and some cards to buy but I'm almost ready. I wanted to share some of Zoe's Christmas pictures and pics of my new stockings.
 I decided to make some new stockings because we had mismatched ones. I found some off white Sunbrella fabric and sewed them up and glued ball fringe onto them. I was having a hard time deciding which trim to use but I ended up using a lime green, orange and pink one. I can change it easily if I want to down the road. I bought some white initial letters and painted them lime green and tied them on with ribbon. Do you love them ?
 I hope that you and your family have a wonderful Christmas holiday. Enjoy your special time with your family and friends !
Come on over to Between Naps on the Porch for Met. Monday.........
Saturday, December 12, 2009
Installation of the Week
 When does working on a Friday night not seem like work ? When you are hanging out with your parents and installing draperies in their new great/family room. My Dad just completed renovating the sun room and family room to one big great room. He is so handy and can do anything.
  I used a paisley fabric for the panels and a coordinating stripe for the valances to keep the room fun. Using fringe and trim is like adding jewelry to your outfit. The onion fringe added a lot to the overall look of the treatment. The back wall was 27 feet wide so it took all 4 of us to lift the board up onto the brackets. It was massive !
While we were there, I recovered the dining room chairs in Fabricut's Ormonde, color: copper. They look really pretty with the orange walls ! 
 My Dad always reads my blog. I know he will be excited to see his room on here...... I love you, Dad !
Sunday, December 6, 2009
Installation of the Week
 My favorite fabric of the week is Schumacher's "Zanzibar Linen Print" it has great colors and gorgeous leaves and flowers. We installed these draperies this week in a commercial building. The window is recessed so there is no room for finials. With windows like this you just butt the rod into the wall. We used 3" diameter rods for a substantial look.
 The conference room had a bay window with 5 angles so I made it in separate pieces so we could transport it. I backed the fabric for the box pleated valance with a black stabilizer to help it hold it's shape and put a 3/4" bias band on the bottom.
 Here's the window before : What a big difference !
Sunday, November 29, 2009
Deck the Halls
 THE MANTLE : The day after Thanksgiving is when the Christmas decorations start going up at our house. There's our sweet pup, Zoe wearing her Christmas bell. I added two things to the mantle this year....... the greenery and...........
 the Eddie Ross wreath that is all over blogland. You know we had to make one too ! My son and I ran into Goodwill one day and found some boxes of ornaments for $1.25 so we pretty much had to make it.
 THE TREE: I finally gave in a couple of years ago and got an artificial tree that is prelit. It is so nice to still have needles on the tree by Christmas day. I only do one tree so it has all the ornaments on it, the kids and mine. I think I'll do a post of my favorite ornaments this week. The ornaments must be put on while singing in your loudest, most off key voice, "Oh Christmas Treee, Oh Christmas Treee, I love to dec-o-rate you !"
 The tree skirt is something I made a few years ago from scraps of tapestry and braided cording.
 THE STAIRS: Mr. Stitches was in charge of wrapping the stairs in greenery and lights. He also hung some icicle lights and a wreath outside.
 THE VILLAGE: I've had this village for a really long time and my son had fun putting it out this year. He arranged everything just the way he wanted it.
 THE NATIVITY: And here's the reason for the season, baby Jesus in the manger with Mary and Joseph and the three wise men.
 I hope you've had as much fun looking as I had decking ! (does anybody know what that means ?)
I'll be linking up to some wonderful sites, be sure to check them out.
DIY Showoff
Metamorphosis Monday
Transformation Thursday
Home for the Holidays
Hooked on Houses
Tuesday, November 24, 2009
My Wrapping, Scrapping, Crafting Closet
 Stick a fork in it, it's done ! I just wanted to show you the room with all the final touches. The knobs that came on the dresser were cute but they were plaid and I'm not really a plaid person so I painted them black. Here is what they looked like before in case you didn't see them. I cannot remember where I got the canvas with the pillows, I'm thinking it was either Kirkland's or HG, it was $ 5.00. My new apron from the Hip Hostess is hanging on the doorknob.
 The canvas needed some work to fit in and match. I know this sign is all over blogland BUT, I'm pretty sure it's nowhere in Cary, NC so I felt good about using it ! I printed it from The Graphics Fairy and Mod Podged it onto the canvas and then blinged it up a bit. (my spell checker doesn't realize that blinged and mod podged are real verbs and blogland is a real place, haha)
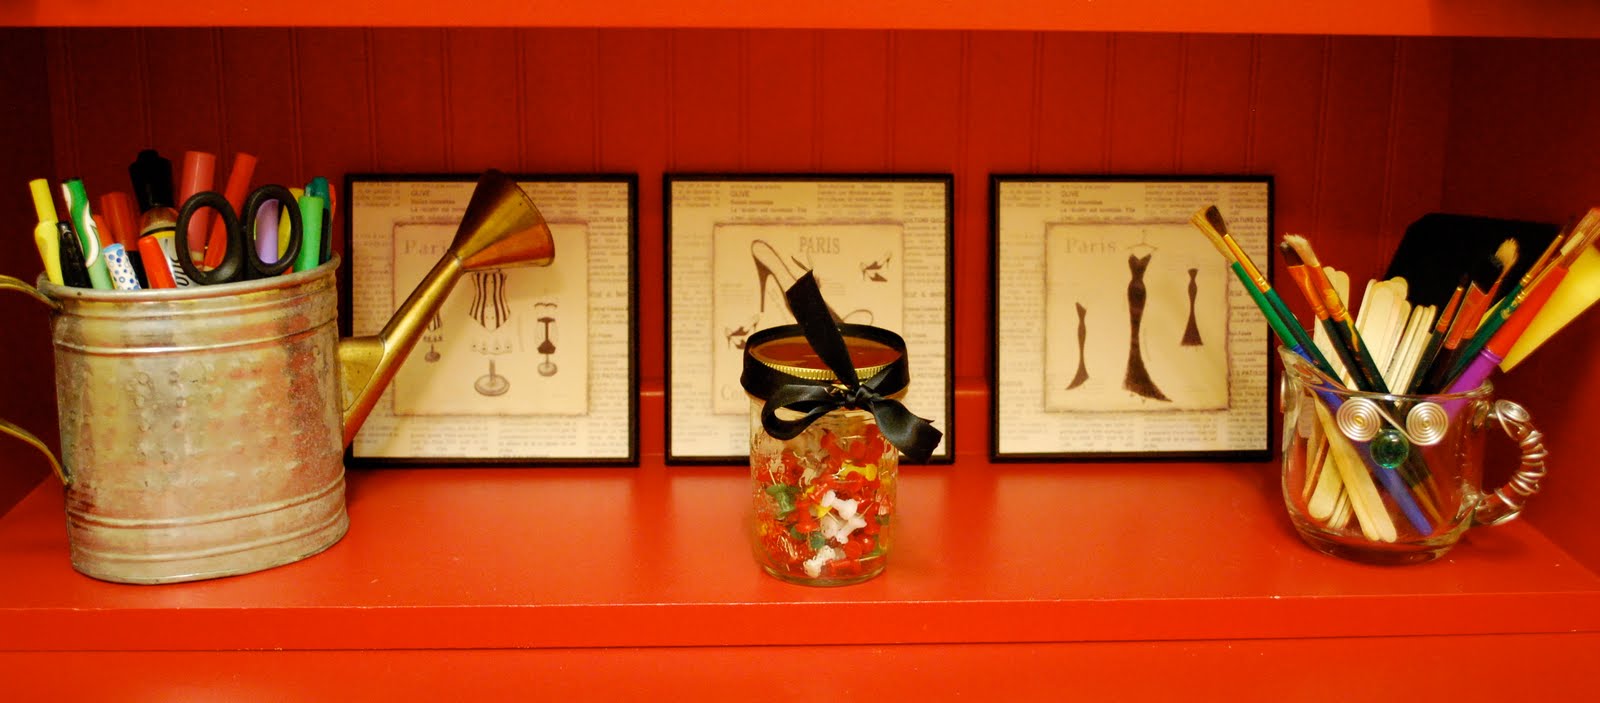
 That's my thimble collection in the middle and my tea lights are in the container on the right. Thanks for looking and I hope you have a very Happy Thanksgiving !
I'm linking to A Soft Place To Land's DIY Day.........
PK at Room Remix is having a linky party for craft closets that I'll be linking to.
Monday, November 23, 2009
Craft Closet
 BEFORE: MESSY COAT CLOSET
 AFTER: MY WRAPPING, SCRAPPING, CRAFTING CLOSET
 I have been wanting a craft room forever but I was running out of square footage in my house so I had to get creative. The before pic is what my coat closet looked like at 8:00 am yesterday and the after is what it had transformed into by 10:00 pm. It is only 95 % finished but I couldn't wait to give you a sneak peek. I'm so excited !
 The first thing I did was empty it totally out and find new homes for all the junk, I mean coats and tools. After taking down the wire rack I painted it with some paint left over from my kitchen, BM Concord Ivory (it's really a golden yellow, nothing ivory about it). I had planned to buy base cabinets, paint and install them, get a countertop and paint and hang pegboard. While perusing my buddy, Craig's list, I found this dresser/bookcase combo for $140.00. It was red and I decided that I could absolutely live with that ! One hour later it was in place and ready for all my goodies.
All my wrapping and tissue paper, scrapbook supplies and crafting stuff lives here now......
I covered a memo board and containers with some fabulous scraps. There are a few more things to do for finishing touches but so far I love it ! I'm linking this to Metamorphosis Monday.......... go check it out.
Tuesday, November 17, 2009
Tassel Party and Pillow Tips
 I made a new tassel for the tassel party that Cheri is having over at It's So Very Cheri. I made this one with a giraffe that I got from the Dollar Store. I added layers of bullion, brush and ball fringe.
 This was the third tassel that I have made, go HERE to see my very first attempt and to see what I use for the inside.
 I made some pillows with iron on transfers last weekend and Karen@StrictlySimpleStyle wanted me to give some tips for making them. I was going to either use a stencil or the iron on transfers. After looking around at AC Moore I decided to buy the transfer paper and download some images from the internet. I found free images you can use at Icon Etc. and finally decided on these king and queen crowns and little flourishes with a retro stripe. I couldn't get it to enlarge to the size I wanted so I just made it as big as I could.
 Tip #1. Enlarge your image in photoshop to get it to the size you need.
Tip #2 Cut as close as you can to the image. They say to leave 1/2" around it but it does have a clear shiny spot around it.
Tip #3 Once you put your iron down don't lift it until the image is set or it will move.
Tip #4 They have transfer paper for white fabrics and one for black or dark fabrics so, use the right one for your fabric.
Tip #5 You can easily make these reversible by putting something different on the back.
It's really easy, give it a try.........
Tuesday, November 10, 2009
Mounting Roman Shades
 When mounting roman shades they can either be inside or outside mounted. The type of window will usually determine which way would be the best. If you don't have enough room to mount inside but you still want the look of an inside mount shade then you can mount them directly on the molding as I did in these two examples.
  If you want a structured shade the rings are spaced horizontally about every 10" apart as in the above shades.
  For a "relaxed" shade the rings are only placed at the outside edges and that gives you the scoop at the bottom like the romans I made for this dining room. You also permanently tie up the bottom 3 rings so there is fullness when the shade is down.
Monday, November 9, 2009
Pillows With Iron on Transfer
 My project this weekend was new pillows for the family room. I've been wanting to bring in some lighter colors to the room and I thought recovering pillows would be a good way to do that. This is my pillow template. It is great for cutting out squares that are square and the really great thing is that you can see the pattern on patterned fabrics to make sure it is centered.
 I bought some iron on transfer paper at AC Moore so I could add a design on the pillows. After hours searching on the internet for images, I finally decided on crowns and flourishes with a retro stripe. I found lots of Victorian images but I wanted something fun for this room. I printed them and then ironed the images onto my sunbrella fabric and added some bullion fringe.
 Here they are in their new home.............. Zoe approves !
 I'm posting these at BNOP for Metamorphosis Monday.


